
Cooking Clutter Recipe #1: Chili
Doing something a little different this week. Let's make some chili.
We know what we said: this is a newsletter that showcases the kitchens of home cooks. And it totally is that, but maybe it can also be a newsletter where we share recipes sometimes? And other cooking/kitchen/food content? Yeah? Yeah!
Now that we’re all on board, let’s make some chili.
Claudia here, and I’m very proud to share that this chili recipe is my very own. On a Friday afternoon in early fall, I stared down the contents of our fridge and pantry looking for dinner inspiration to hit, and realized that we had all the makings of chili. In the first edition of the newsletter, I waxed about my love for an improvisable, customizable cold weather recipe. I fired up google.com, skimmed a few chili recipes, and tried my hand at making something that I could call my own. This is that - I hope you like following along and that you try your hand at it too, making it your very own however you see fit.
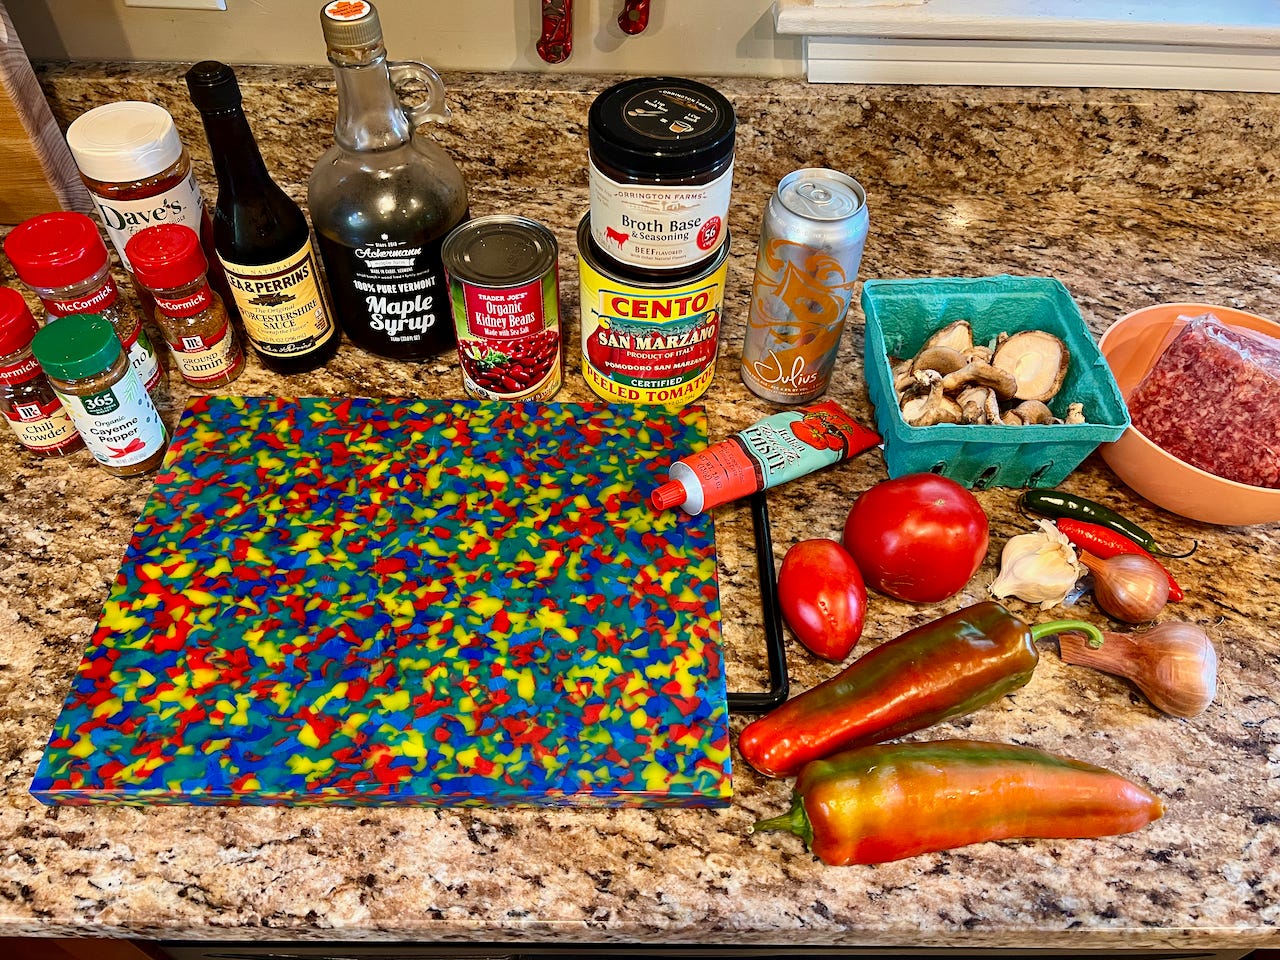
Ingredients:
1 lb ground beef
2 fresh tomatoes
2 hot peppers (adjust according to your spice preferences)
2 bell peppers
2 shallots
Mushrooms (I used shiitake)
A few cloves garlic
1 can San Marzano tomatoes
2 tbsp tomato paste
1 can red kidney beans
2 servings of beef broth base or beef bouillon cubes
Maple syrup
Worcestershire
1 cup beer of your choice (I used an IPA from Treehouse Brewing Company)
Dry spices:
Smoked paprika
Cumin
Cayenne
Chili powder
Oregano
2 bay leaves
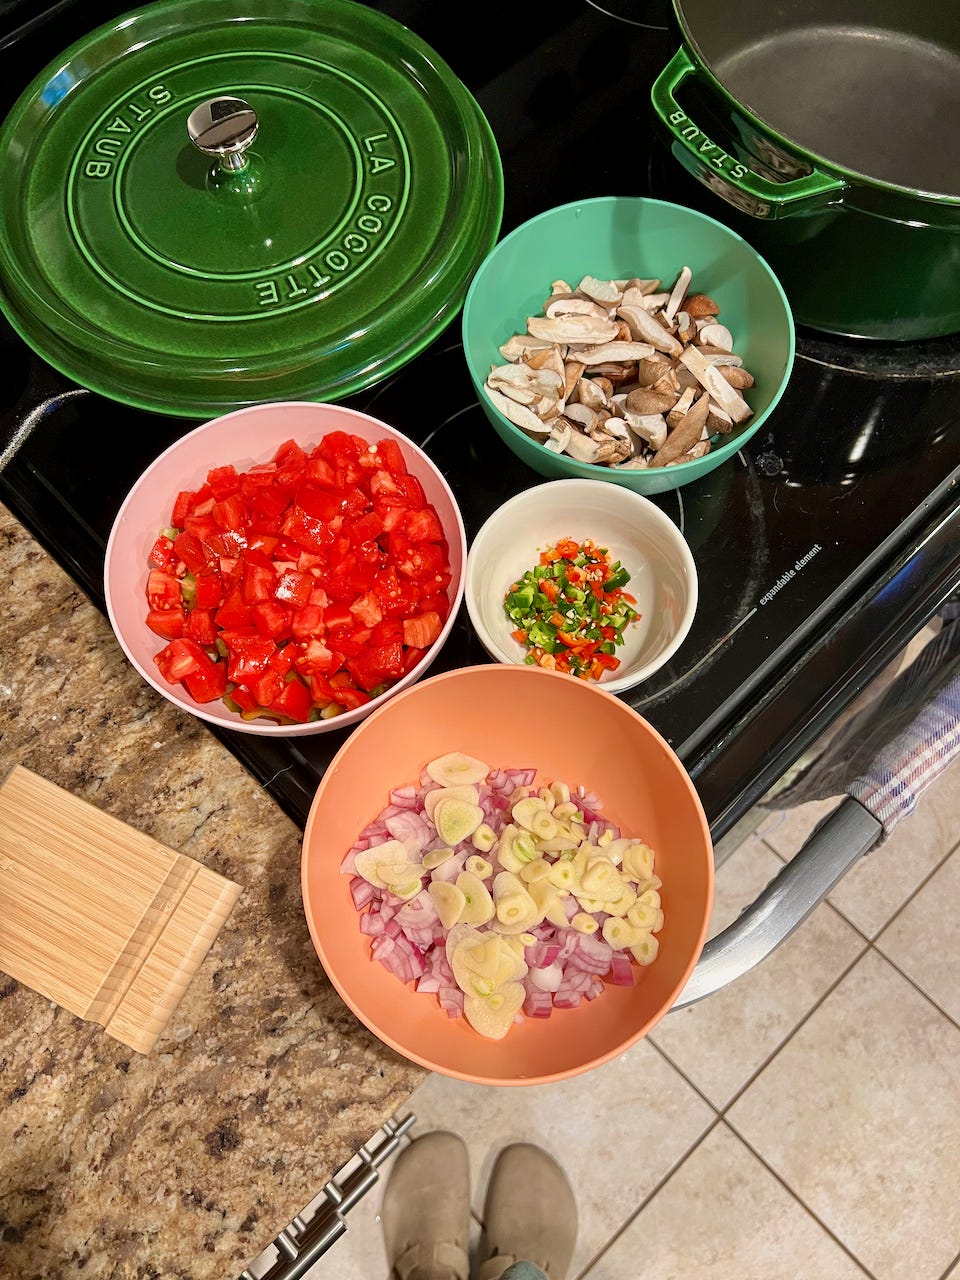
Step 1: Chopping and Prep
I always find it helpful when recipes share how to organize your prepped ingredients for cooking, so here it goes: shallots with garlic, mushrooms on their own, hot pepper on their own, and fresh tomatoes with bell peppers.
Here’s how to slice and dice each component:
Finely dice your shallots and thinly slice your garlic.
Chop up your mushrooms. If using shiitake, remove stems and then slice tops into 1/4” slices.
Finely dice your hot peppers.
Chop up your bell peppers and fresh tomatoes into nice little chunks. You want some texture, so don’t go too small on the bell peppers. At the same time, you probably don’t want huge chunks. Do what feels right.
Step 2: Get Cooking
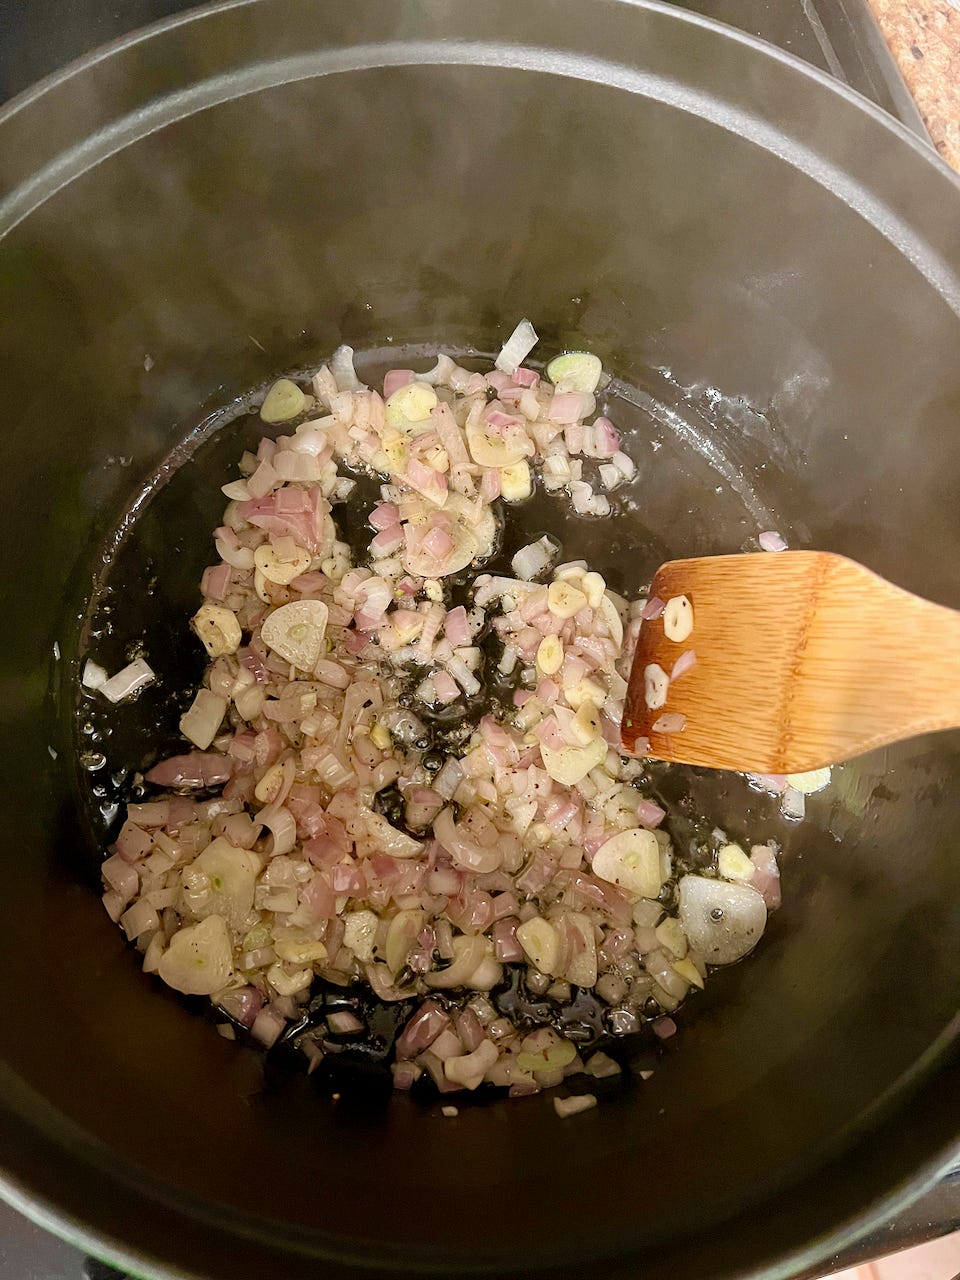
In a large, sturdy pot or dutch oven, heat up a couple glugs (a very technical term) of olive oil over medium or medium-high. Once shimmering, add your shallots and garlic and some generous doses of salt and pepper. Cook, stirring often, until softened and you see some light golden color developing on the shallots.
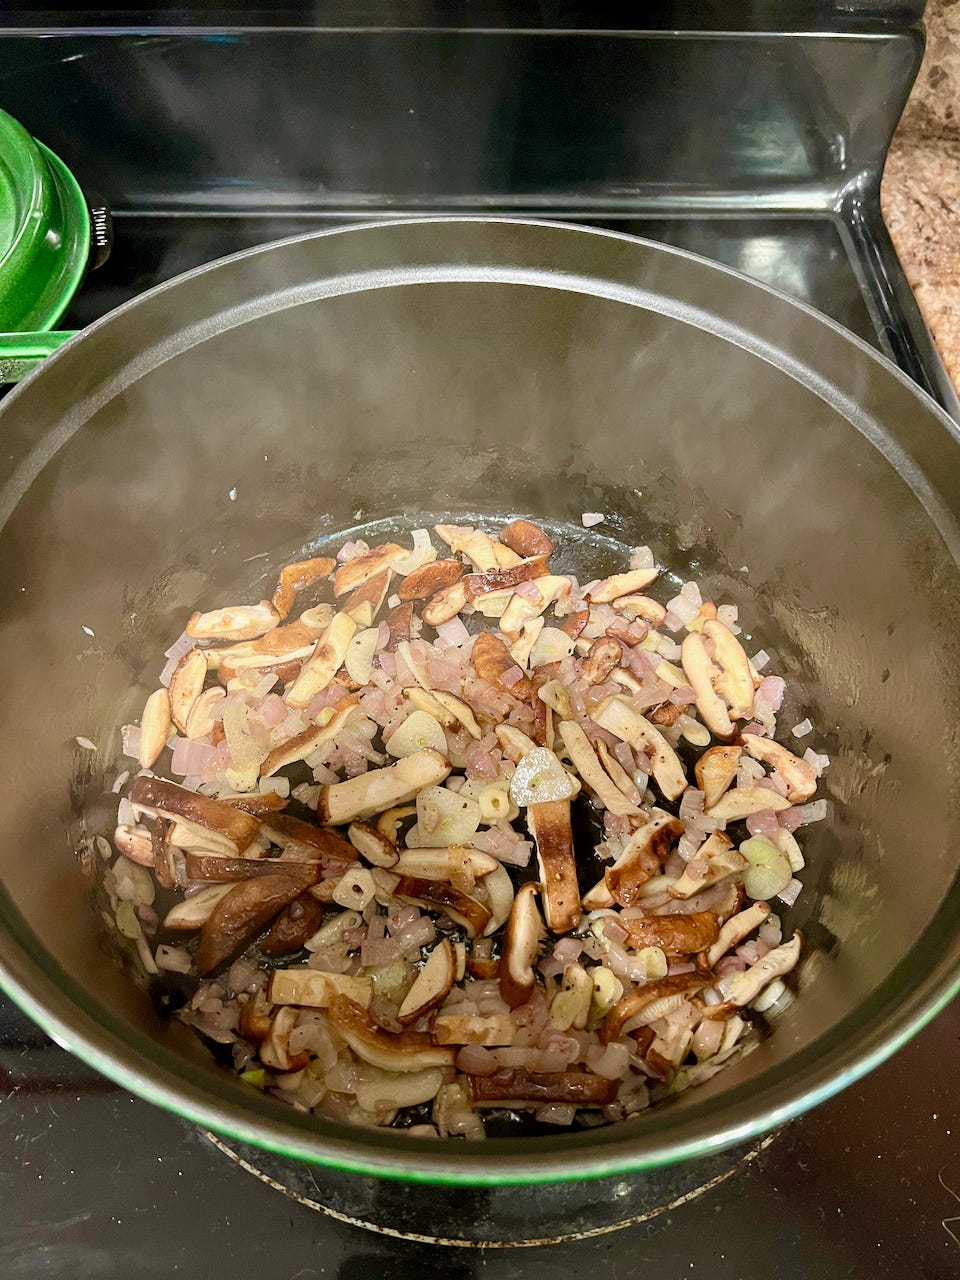
Once you hit those cues with your shallots and garlic, add in your mushrooms. You want to cook these until the water has released and you see some browning.
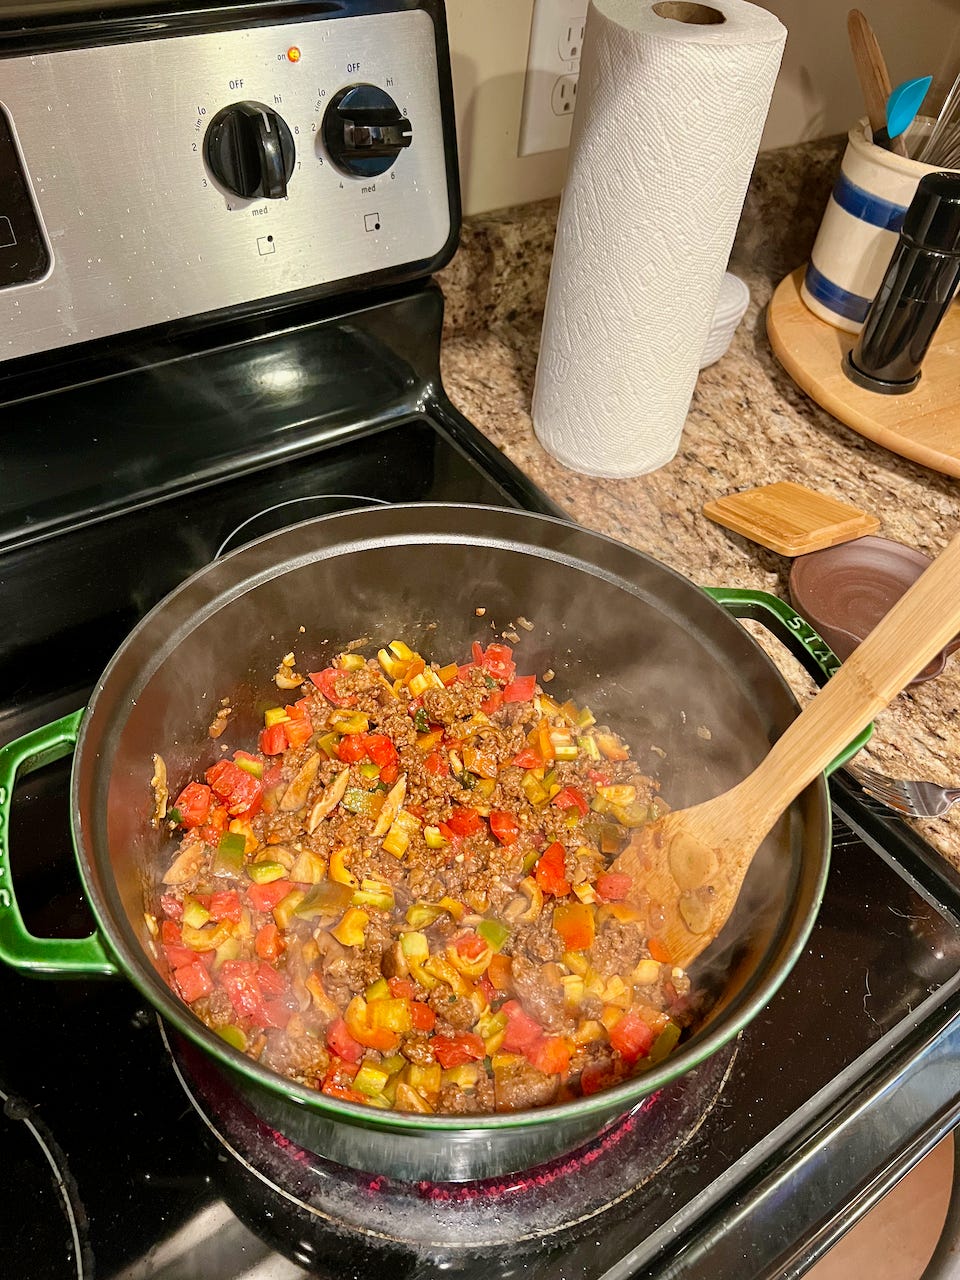
Once your mushrooms are looking good, add your ground beef. Use your cooking utensil to chop it up into bits as it cooks - I like a wooden spatula for this. Keep going until beef is mostly browned, then add in your hot peppers and dry seasonings. I would start with a 1/2 teaspoon of each dry seasoning and taste for spice once the beef is cooked enough to be safe for tasting. How much of each seasoning you want to use depends on your personal preference and on the spice level of your hot peppers.
Next add a few dashes of Worcestershire, about 2 tablespoons of tomato paste, your 2 servings of beef base or bouillon, and a glug (there it is again) of maple syrup. Stir everything up really well to distribute those flavors, and keep going with the beef until nice and browned.
Once your beef is nice and browned, add your tomatoes and bell peppers. Let those cook until peppers are softened and your tomatoes have begun to break down a bit.
Once you have some soft peppers and broken down tomatoes, add 1 cup of beer and scrape up any stuck on bits remaining on the bottom of the pot. Your peppers and tomatoes probably already did a lot of deglazing for you, but stuck on bits = flavor and deglazing now = easier cleanup later, so why not be thorough with it? Let the beer cook off until the liquid is about half reduced. The beauty of this step is if you use a 16 oz beer, you still have half of it as a treat for the chef.
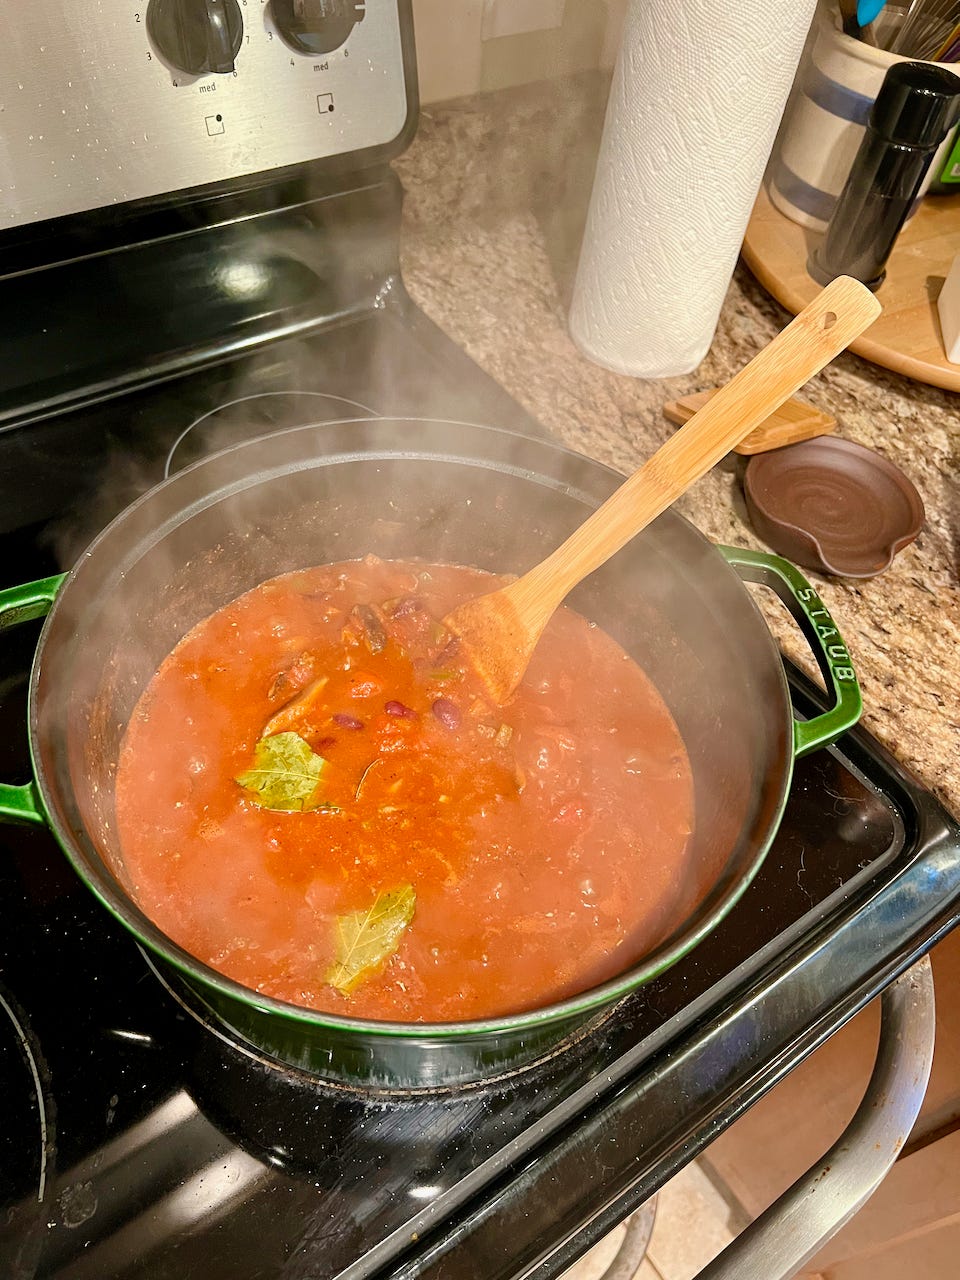
Once you’ve reduced the beer, go ahead and add everything else. Add your canned tomatoes, using your cooking utensil to break them up. Then rinse your kidney beans and add those. Add 1/2 cup of water. Top with a couple bay leaves. Stir it all up well.
Step 3: Walk Away
Bring everything up to a boil, then reduce heat to low-ish / medium-ish, cover, and walk away. You can check in and give things a stir every once in a while, but for the most part you can do whatever you want with the next 2 hours.
Optional Step: Cornbread and Honey Butter
You have 2 hours and a wide open oven. And cornbread is really great with chili. And honey butter is really great with cornbread. You see where I’m going with this.
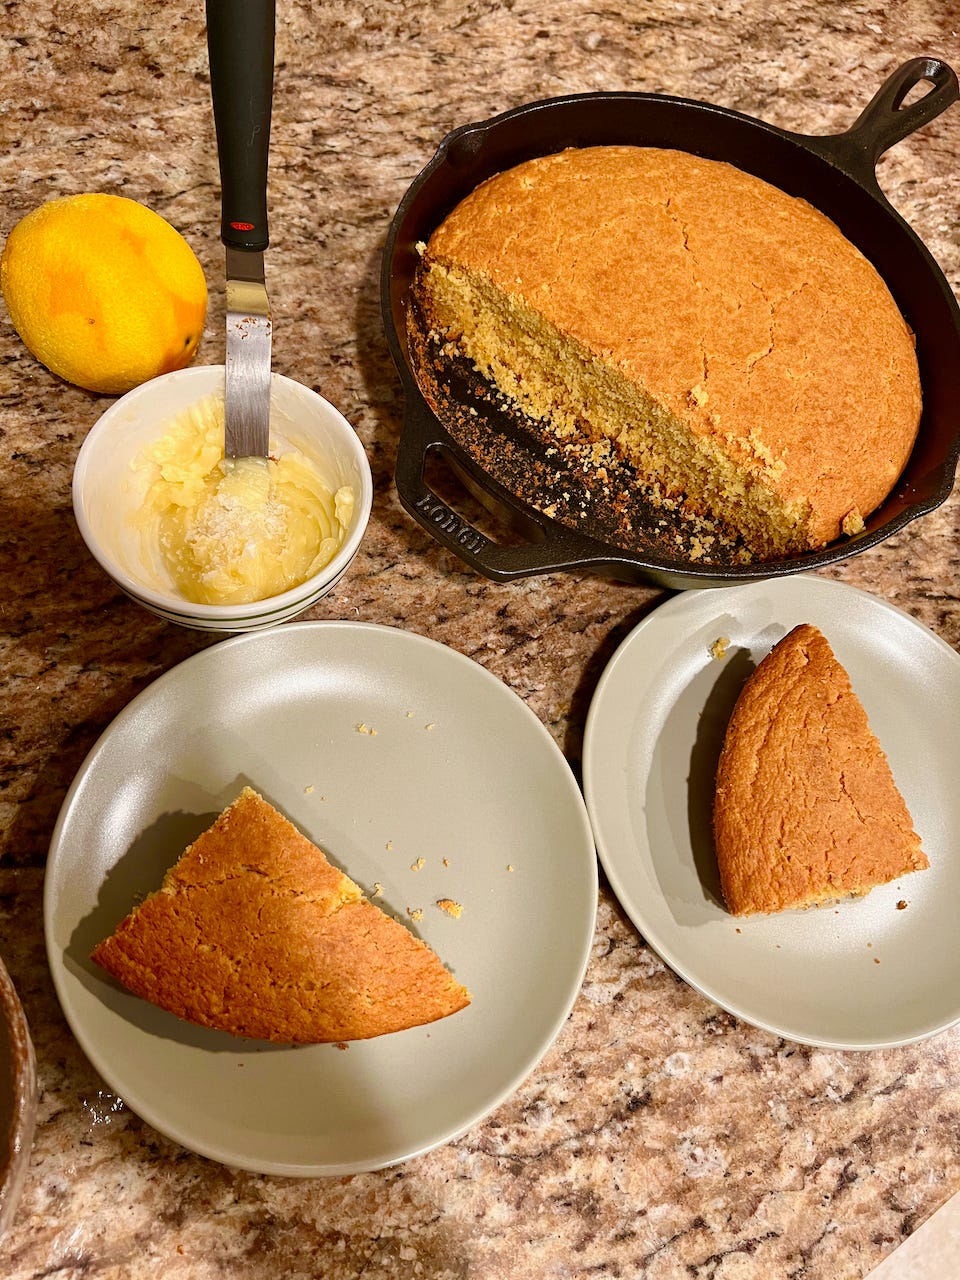
You can use any cornbread recipe you like! I like to add the zest of an orange, which is my secret cornbread hack.
To make honey butter, let some butter soften - a heatproof bowl placed in the back corner of the stove while your chili simmers and cornbread cooks is a great way to get soft butter. Once soft, add a tablespoon or 2 of honey and mash together with a fork to combine. Top with some flaky salt and spread on your warm cornbread.
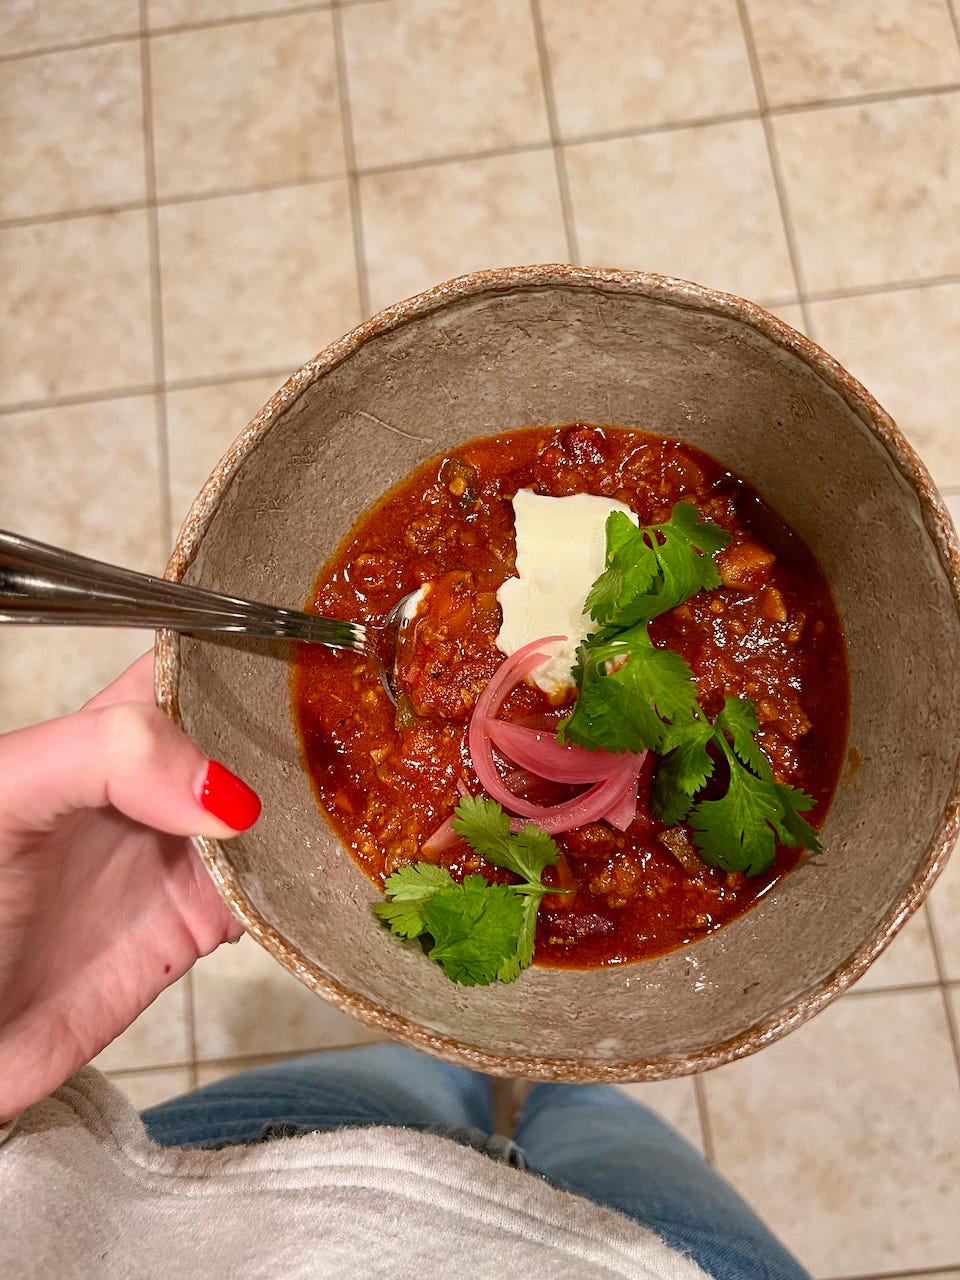
Step 4: Garnish and Enjoy
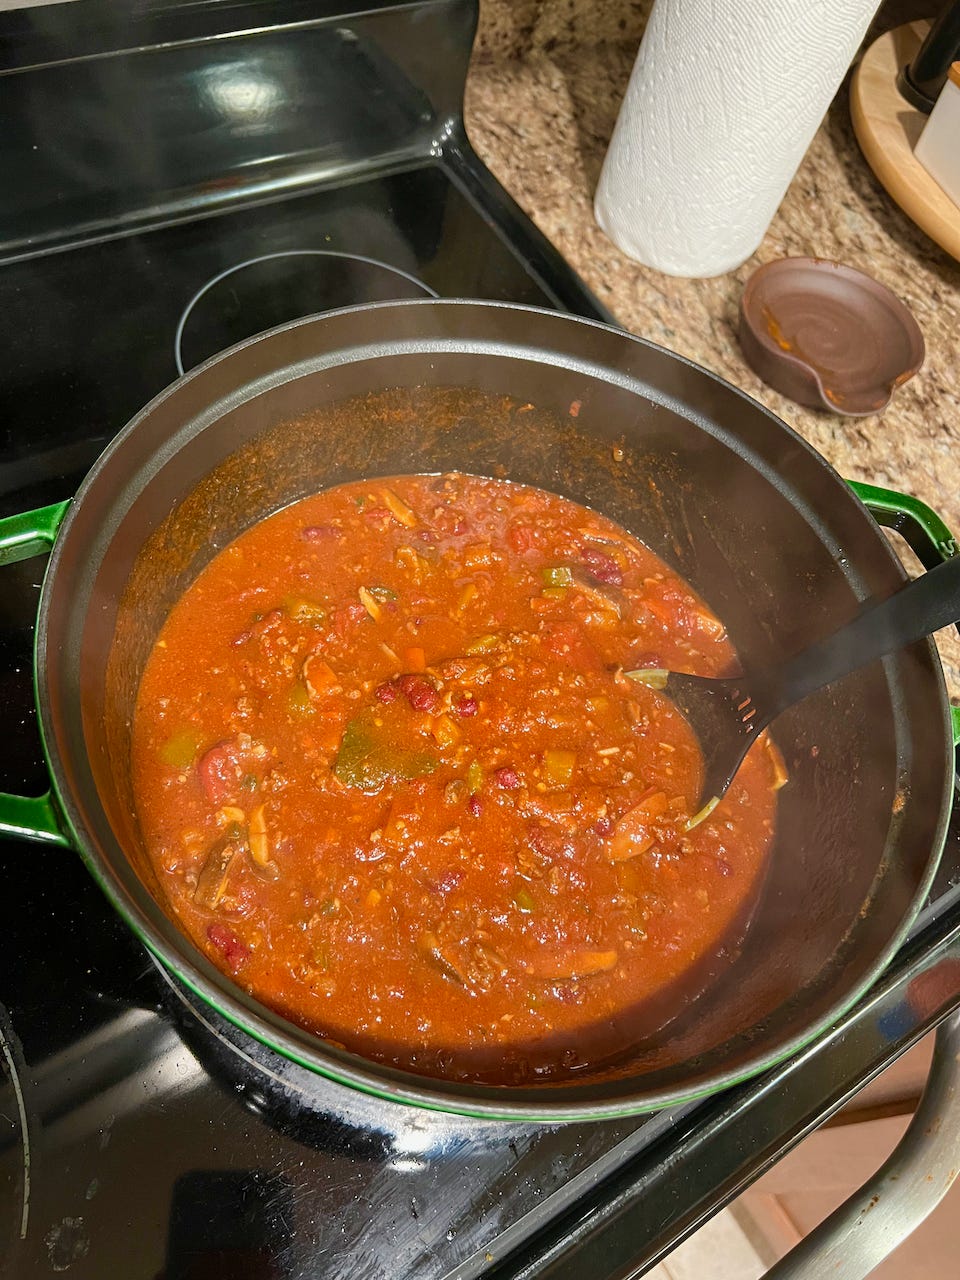
After 2 hours is up, your chili is going to have a deeper color (and flavor), you’ll see some reduction in liquid when you give it a stir, and your beef will be super tender.
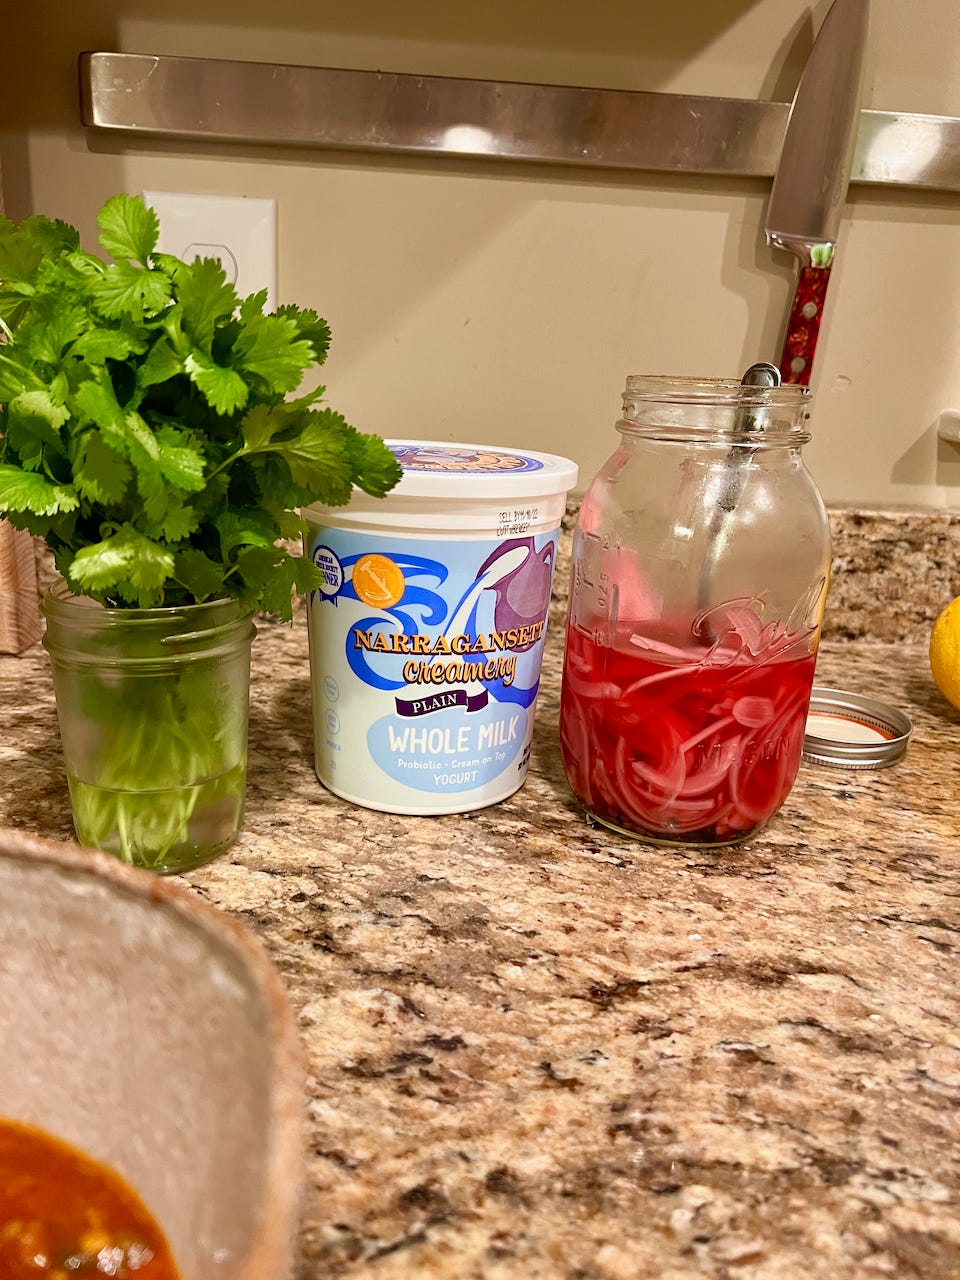
One of the best parts of a bowl of chili is, in my opinion, the garnishes. I went with cilantro, plain yogurt, and some pickled red onions. You could go with cheese, sour cream, broken up tortilla chips - all would be delicious.
Once you have your garnishes straightened out, all that’s left to do is enjoy!
Thanks for making chili with me. Happy Cooking!
Fun update: we’re on TikTok! Check out our first video here, and stay tuned for more to come.